


I bought a diode laser for a single garage project and it turned into a weekend habit: coasters, badge tags, small signs, all the little things a laser makes addictive. What I did not want was to pay for a pricey CAD license to get there, so I started working through whatever free software the community trusted — lightweight GRBL senders, full design suites, and everything between.
I figured I would pick one tool in an hour. That did not happen. Each program solved a different slice of the job: some were great at vector prep, others nailed raster dithering, and a few focused purely on machine control. What I picked up from watching pro makers and small shops is that the winners keep a lean stack — one design app they know well, one reliable sender, and a backup plan for when a driver fails mid-project. You do not need the fanciest UI or paid plugins to get sharp burns; you need predictable output, safe defaults, and workflows that match your machine.
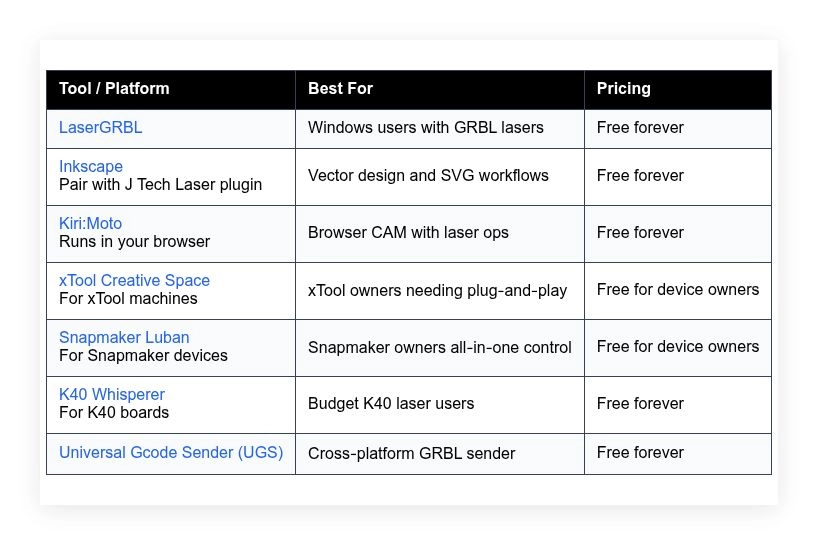
This guide is my honest take on the best free options right now — what each does best, where it falls short, and who it fits, including device-specific tools so you do not waste time. Here is the snapshot before the deep dive.
Comparison of 7 best free laser engraving software in 2026 with pricing and recommended use cases
Scroll down for my detailed take on each option. I will also share which one I use most and the easiest free pick for beginners.
What is a laser engraving software?
Laser engraving software is a design and machine-control tool that prepares images or vectors, sets power and speed, and sends safe G-code or device commands to a laser. Good software is the second measure in the old “measure twice, cut once” rule — it saves material, keeps passes consistent, and protects your hardware.
The difference shows in the output: tune paths and dithering well and a 15-minute engrave can look like a pro shop’s work, while the same job with poor settings might need two retries and waste a blank. The core purpose is to let makers, hobbyists, and small shops import vectors or photos, choose materials and settings, preview toolpaths, and drive engravers to clean, repeatable results.
These tools often pair with vector editors like Inkscape or Illustrator, camera alignment aids, materials libraries, and GRBL senders for stable serial communication. Not every program handles design, prep, and control equally well, so choosing the right fit matters.
How to choose the best laser engraving software
Picking software can feel overwhelming — there are many downloads, device-specific apps, and plugins, and not all of them work well with your controller. I wrote this to help you match your machine, your comfort level, and your budget, and to steer you to a setup you can trust on day one.
Most guides you find are written by vendors or by sites filled with sponsored placements. I am not sponsored by any platform here. This is my straight take after using these tools and talking with real users. A few questions worth asking:
- How generous is the free tier, and are exports limited?
- Can I do core tasks fast: import SVG, set power, preview?
- Will it scale as I add larger jobs or new materials?
- How does cost change if I need add-ons or plugins later?
- Does it cover my full workflow: vector, raster, and sending?
- What analytics or job logs help me repeat settings?
- How hard is it to migrate projects to another sender?
- Is it stable with my controller and USB chipset?
- Does it support GRBL, S-values, M4 dynamic power, and homing?
The picks below answer these points so you can choose with confidence. Let us get into the list.
7 best free laser engraving software in 2026
Here are my top picks for the best laser engraving software:
- LaserGRBL
- Inkscape
- Kiri:Moto
- xTool Creative Space
- Snapmaker Luban
- K40 Whisperer
- Universal Gcode Sender (UGS)
Let us see which one is right for you.
1. LaserGRBL
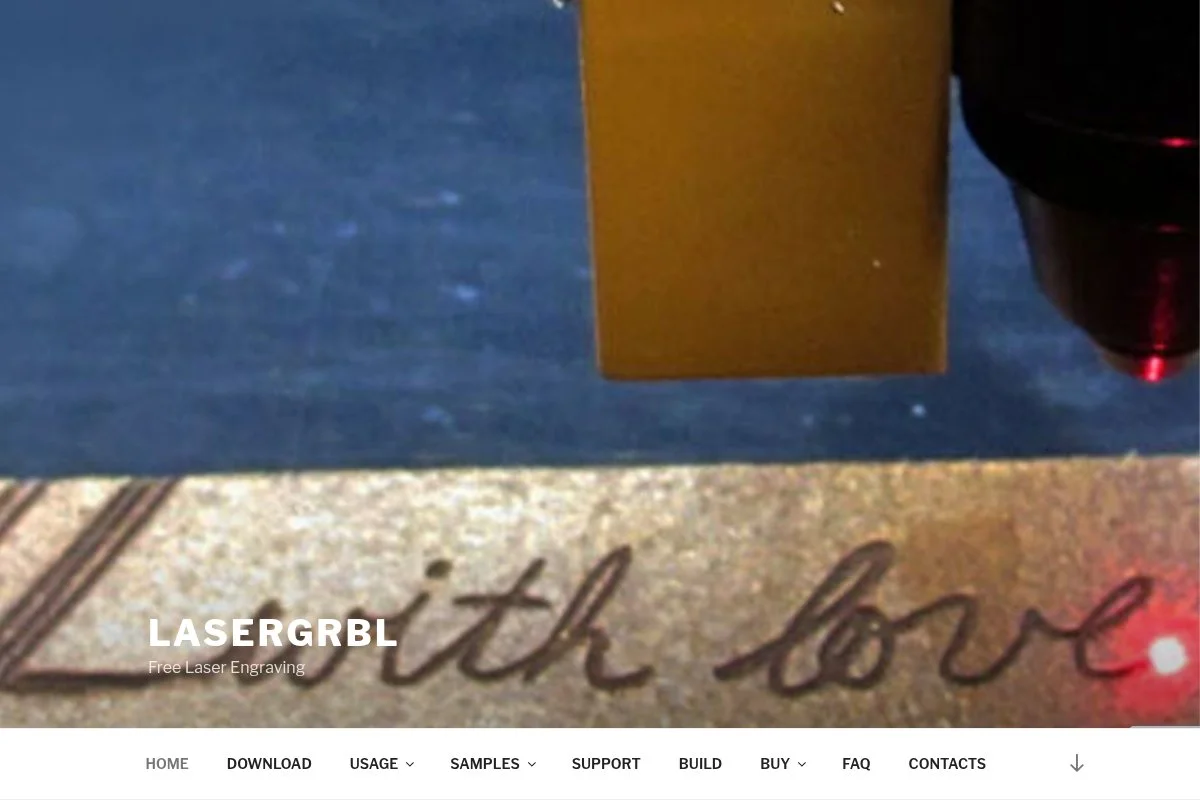
LaserGRBL is a focused Windows app for GRBL-based diode and CO2 controllers. It has become a go-to in hobby circles because it is free, fast, and stable with common boards.
Getting started is simple: install, connect over USB, set COM and baud, then load an SVG or image, and the main workflow is clean — image import, dithering or vector conversion, power and speed, preview, and send. Recent releases tightened GRBL compatibility and image handling, and the app supports common dithering modes like Stucki and Floyd-Steinberg plus vector trace improvements that help small logos hold sharp corners. There are no paid tiers — that is the draw — yet it still packs advanced touches like live jogging, macros, custom buttons, and material preset import that rival paid tools for core control.
I use LaserGRBL for quick image burns and for testing new materials — it connects fast and does not fight my drivers, which saves setup time when I just want to run a scrap test. I also appreciate the community: plenty of shared profiles and tips, and issues get answered in forums fast, which is exactly what a new user needs.
How LaserGRBL works and key features
The interface centers on a preview pane, a jog/control panel, and a settings panel. You can import PNG, JPG, BMP, and SVG, then switch between raster dithering or vector engraving and cutting. Template files are not a thing here, but you can save parameter profiles for materials; advanced users can tweak S-values, M3 or M4 modes, and Z moves if your rig supports focus shifts.
Job stats show time estimates, and you get simple logs for troubleshooting. Automation comes from macros and custom buttons, which help with homing, framing, and air-assist toggles if wired. Extras include camera framing via plugins and an image tweak panel for contrast, gamma, and smoothing. Support is community-led with guides and active threads on hobby forums, where makers routinely report that it sends clean G-code and just works with cheap boards. Overall, it is beginner-friendly for control and strong enough for advanced GRBL setups.
Who LaserGRBL is for
Best for GRBL diode owners, Ortur and Atomstack users, budget CO2 conversions, school labs with Windows PCs, and anyone who wants a fast, stable sender. It excels at photo dithering, logo engraves, and light cuts. If you need a full design suite or Mac support, pair it with Inkscape or pick a cross-platform sender. No coding skill needed for basics.
LaserGRBL pricing
LaserGRBL uses a free, donation-supported model. There are no paid tiers or locked features. You download it and get the full feature set.
- Free: $0/month, unlimited jobs, includes image import, vector trace, dithering modes, GRBL control, macros, and job preview
Value is excellent compared with paid senders since nothing is gated. If you want templates or a built-in design suite, you will need a second tool, but for sending and basic prep it is hard to beat free.
LaserGRBL pros and cons
- Pros: Free and lightweight, strong GRBL control, solid photo dithering, quick setup on Windows
- Pros: Macros and presets save time, active user community
- Cons: Windows only, limited design tools, no official support team
- Cons: Not ideal for camera alignment or complex multi-layer projects
If you use GRBL on Windows, start here. If you need cross-platform design and control in one app, consider Kiri:Moto or a device suite.
LaserGRBL reviews
Limited listings on major review sites. Community feedback on Reddit and maker forums is broadly positive for stability and value.
2. Inkscape
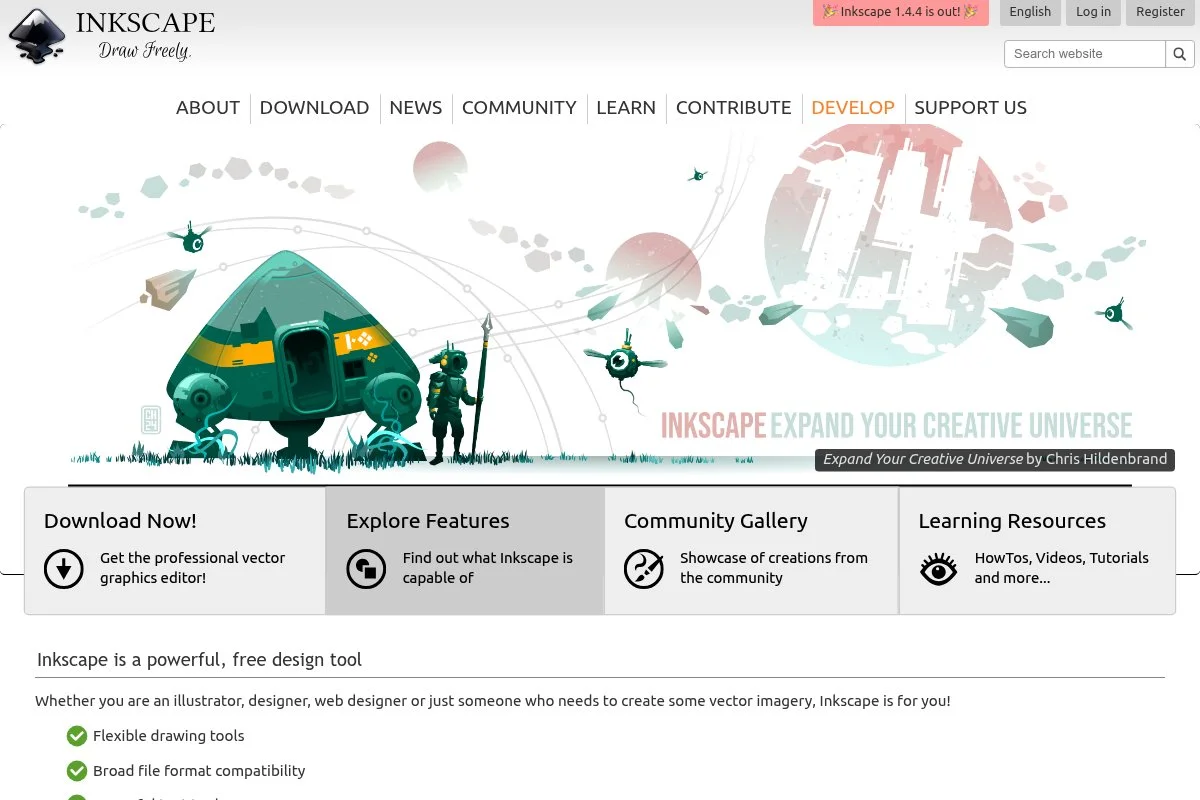
Inkscape is a free, open-source vector editor that rivals paid design suites for SVG work. It is led by a long-running developer community and used across education and maker spaces.
You can start free on Windows, macOS, or Linux, and the interface will feel familiar if you know Illustrator. Day to day, I draw paths, set strokes, align shapes, and export clean SVGs or G-code via plugins. Recent versions improved performance, shape tools, and usability, and with the J Tech Photonics Laser Tool plugin or similar extensions you can set laser power via colors or layers and generate G-code. Advanced power comes from extensions, boolean tools, and precise node editing — it also supports CMYK via plugins, stroke expansion for kerf planning, and snapping for fixture layouts.
I rely on Inkscape for almost all vector prep, because clean SVGs reduce surprises in senders like LaserGRBL or UGS — that single step saves materials over time. The docs are thorough and the plugin ecosystem is rich, which matters when you need a niche export or a one-off toolpath trick.
How Inkscape works and key features
Inkscape uses a standard vector canvas with layers, path effects, and a precise node editor. You can start with community templates for tags, coasters, or signs, then tune sizes and kerf; customization is deep with styles, symbols, and reusable assets, and advanced users can add custom G-code headers, use plugins for hatch fills, and export DXF for other CAM tools.
You get basic document stats and extensions that annotate job notes, and automation is possible via command-line exports for batch work. Extras include trace bitmap, text on path, and alignment tools that make production layouts fast, with support from extensive guides, forums, and video tutorials — users often describe it as Illustrator-level control without the bill, which lines up with my experience. Overall, it is beginner-friendly for drawing and powerful for advanced vector prep.
Who Inkscape is for
Great for sign makers, Etsy sellers, teachers, hobbyists, and anyone who needs clean SVGs. It shines for logos, text work, badges, and tight layout control. With plugins, it can output G-code, but many users pair it with a sender. If you need built-in camera alignment or device control, use a companion app.
Inkscape pricing
Inkscape is free and open source with no paid tiers. Donations fund development.
- Free: $0/month, unlimited documents, includes full vector toolset, extensions, and cross-platform support
Compared with paid design suites, the value is high if you work in SVG. If you also need photo editing, pair it with a free raster tool or your sender’s dithering options.
Inkscape pros and cons
- Pros: Full vector toolkit for free, huge plugin library, clean SVG export
- Pros: Cross-platform, strong community docs and tutorials
- Cons: Learning curve for extensions, no native device control
- Cons: Complex files can feel heavy on older machines
If your engraves start as vectors, this should be in your stack. If you only do photo burns, a sender with image tools may be faster.
Inkscape reviews
G2 lists Inkscape with strong user ratings and many reviews. Ratings focus on value and flexibility. Numbers vary by source, but feedback is consistently positive.
3. Kiri:Moto
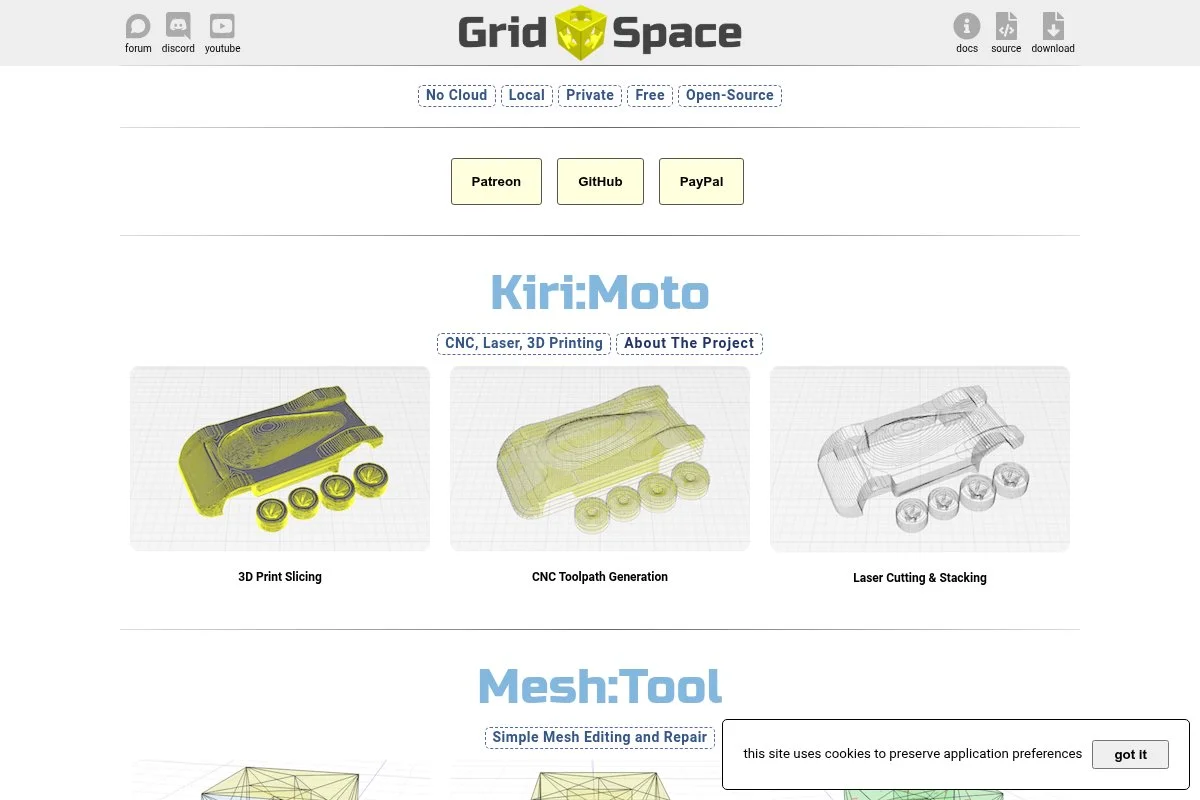
Kiri:Moto is a browser-based CAM by Grid.Space that handles 3D printing, CNC, and laser operations. It runs locally in your browser, so there is nothing to install.
You launch it free at grid.space. For laser, import SVGs, set operations, tune power and speed, and preview toolpaths in a clear viewport; it exports G-code you can send with your favorite sender. Recent updates improved performance and UI polish, and laser workflows benefit from path optimization and operation sequencing, which makes it handy on Chromebooks or locked-down work PCs. Advanced users get fine control over path ordering, stepovers for fills, and custom post settings, and it can live in a workflow next to Inkscape and a GRBL sender without conflicts.
I use it when I want a clean laser CAM preview before committing — the visual path view helps me spot travel moves that might singe edges. Being browser-based also makes sharing setups with teammates easy, with no license headaches, which I appreciate when teaching a friend.
How Kiri:Moto works and key features
The UI splits a 3D viewport and a right-side panel for operations. You can define per-color passes, set laser power, speeds, and passes, and preview the exact motion order; templates come from saved device profiles and material presets you can reuse, and advanced users can tweak G-code headers and footers and tune acceleration limits.
Kiri:Moto logs job stats and offers simple time estimates, and automation comes from reusable device and material profiles that keep settings consistent across jobs. It does not send G-code directly — you pair it with LaserGRBL, UGS, or your device app — and support is community-driven with documentation and active developer responses. In short, it balances approachability with fine control for path planning.
Who Kiri:Moto is for
Good for Chromebook users, classrooms, makers who want CAM previews, and anyone avoiding installs. It shines for layered vector jobs and production runs where path order matters. If you need direct device control or camera alignment, use a sender or device suite alongside it. Beginner-friendly with room to grow.
Kiri:Moto pricing
Kiri:Moto is free to use in the browser. There are no paid tiers for laser features.
- Free: $0/month, includes laser CAM operations, material and device profiles, path preview, and G-code export
The value is strong if you need cross-platform CAM without installs. Pairing it with a free sender keeps your total cost at zero.
Kiri:Moto pros and cons
- Pros: Runs in a browser, detailed path previews, reusable profiles
- Pros: Works on low-spec machines and school devices
- Cons: No direct machine control, offline use depends on caching
- Cons: Fewer photo engraving tools than device suites
If you want CAM clarity and portability, it is a smart pick. If you prefer an all-in-one device app, look at xTool Creative Space or Luban.
Kiri:Moto reviews
Limited presence on G2 or Capterra. Maker forums and GitHub issues reflect active development and satisfied users.
4. xTool Creative Space

xTool Creative Space is the free design and control app for xTool laser machines. It is made by Makeblock’s xTool team and tailored to their hardware lineup.
Install it free, connect your xTool, and it detects bed size and accessories; the editor handles vector shapes, text, images, and material presets tied to xTool modules. xTool keeps adding features, including better image processing and smoother boolean operations, which means faster setup with fewer manual tweaks for owners. Higher-end features include camera alignment on supported models, material libraries, and framing tools that help with jigs and batch work — usually paid in third-party apps, so having them free is handy.
I like using it for quick jobs on an xTool because presets get me close on the first try — tweaking power by a few points is often all it takes. Support content is thorough, with device guides and videos that match menus in the app, which shortens the learning curve.
How xTool Creative Space works and key features
The editor is WYSIWYG with drag-and-drop. You import images or SVGs, assign operations per layer, and choose material presets, and camera preview on supported machines helps position artwork. Templates include common projects like tags and boxes, and advanced options let you tune passes, direction, and dot mode on compatible heads.
It tracks job times and remembers recent materials, and automation comes from reusable presets and saved workflows tied to accessories. Extra tools include shape libraries and alignment aids, with support from xTool’s help center and active owner groups. Overall, it is beginner-friendly and polished for xTool devices.
Who xTool Creative Space is for
Best for xTool owners, classrooms, and small shops that want plug-and-play presets and camera alignment. It excels at photo engraving and production layouts on xTool gear. If you use non-xTool machines, this is not for you. No coding needed.
xTool Creative Space pricing
The software is free for xTool users. There are no paid tiers for core features.
- Free: $0/month, includes design editor, camera alignment on supported models, presets, job control, and framing
Value is strong if you own xTool hardware. It removes the need for separate senders for most everyday jobs.
xTool Creative Space pros and cons
- Pros: Free device suite, camera alignment, tuned presets
- Pros: Clean UI that matches xTool hardware features
- Cons: Device-locked, limited for non-xTool machines
- Cons: Power users may want deeper CAM controls
If you own an xTool, use it. If you plan to switch brands, a generic sender might be safer.
xTool Creative Space reviews
Not widely listed on G2 or Capterra as a standalone app. Owner groups and the xTool community report positive ease-of-use for beginners.
5. Snapmaker Luban
Snapmaker Luban is the free companion app for Snapmaker’s modular machines. It handles 3D printing, CNC, and laser, which suits the company’s all-in-one hardware.
Install it free, connect the device, and pick Laser mode; the editor supports vectors, images, text, and material presets that line up with Snapmaker modules. Luban updates have focused on stability and workflow polish, and laser users get better image processing and safer defaults that help new owners avoid overburning. Advanced features include camera capture on supported models for alignment, multi-pass control, and job queuing, which fits batch production with jigs and repeatable placements.
I like it for quick, accurate placement on the Snapmaker bed — the presets reduce guesswork, which is ideal for a shared maker space. The tutorials and forum are solid, and firmware notes explain what changed, which I always check before a long job.
How Snapmaker Luban works and key features
The UI guides you from import to operation setup to preview. You assign engrave or cut per object, set power and speed, and check a live preview before sending over Wi-Fi or USB; there are basic templates and sample projects, and advanced users can adjust dwell times, dot modes, and multiple passes for thicker stock.
Luban tracks job times and retains material presets, and presets and project files make repeating jobs fast. Support comes from Snapmaker’s docs and forums. It is beginner-friendly for Snapmaker owners and covers daily jobs well.
Who Snapmaker Luban is for
Great for Snapmaker owners, schools, and shared labs. It excels at camera-assisted placement, raster engraving, and light cutting on the Snapmaker system. If you do not own a Snapmaker, pick a vendor-agnostic tool. No technical skill needed for basics.
Snapmaker Luban pricing
Luban is free for Snapmaker users, with full laser features included.
- Free: $0/month, includes design editor, device control, camera alignment on supported models, presets, Wi-Fi or USB sending
It replaces separate senders for most owners. If you outgrow it, you can still export vectors and use other CAM tools.
Snapmaker Luban pros and cons
- Pros: Free device suite, camera alignment, safe presets
- Pros: Supports 3D print and CNC too, handy for combo rigs
- Cons: Tied to Snapmaker hardware, fewer advanced CAM tweaks
- Cons: Heavy projects can feel slower on older PCs
If you own a Snapmaker, Luban is the easiest starting point. Power users may add a separate CAM for niche workflows.
Snapmaker Luban reviews
Few listings on major review sites as a standalone tool. User forums report steady progress and good onboarding for new owners.
6. K40 Whisperer
K40 Whisperer is a free control program for K40 lasers with stock controller boards. It is written and maintained by Scorch Works and has helped extend the life of many budget CO2 rigs.
Setup is simple: install the drivers, load a DXF, SVG, or BMP, then assign colors to cut or engrave, and Whisperer sends jobs directly to the K40 without third-party dongles. Updates have focused on stability and compatibility with common K40 variants, which makes it a practical solution if you kept the stock board and want predictable control. While it lacks high-end design tools, it supports layered operations, job origin control, and framing — pair it with Inkscape for design and you have a zero-cost stack.
I keep it around for shops that still run stock K40s because it saves a controller swap, which is nice if the budget is tight. Documentation on Scorch Works is clear, with screenshots that match the app, which helps new users avoid setup traps.
How K40 Whisperer works and key features
The interface lets you import artwork, map colors to operations, set speeds and power, and preview the job area. You can set origins, margins, and make test burns to dial in focus; templates are minimal, but reusable files with color layers work well, and advanced users can tune step sizes and job order for layered cuts and engraves.
Logs and time estimates are basic, and there is no automation beyond saved files and settings. Support is community-based with guides on scorchworks.com. Overall, it is a dependable bridge between basic K40 hardware and real projects.
Who K40 Whisperer is for
Perfect for K40 owners with stock boards, repair shops keeping old rigs running, and schools with hand-me-down machines. It excels at simple vector cuts and light raster engraves. If you upgraded to GRBL or a new controller, use a sender like LaserGRBL or UGS instead. Beginner-friendly with Inkscape pairing.
K40 Whisperer pricing
K40 Whisperer is free to download and use.
- Free: $0/month, includes import of SVG/DXF/BMP, color-mapped operations, device control, framing, and job origin settings
Given the price, it is the obvious pick for stock K40 boards. If you later swap controllers, you will likely move to a GRBL workflow.
K40 Whisperer pros and cons
- Pros: Free, works with stock K40 boards, simple mapping by color
- Pros: Clear docs from Scorch Works
- Cons: Narrow device support, limited design tools
- Cons: Basic previews and logs
If you run a stock K40, it is the most straightforward path. Anyone on newer controllers should look elsewhere.
K40 Whisperer reviews
No major listings on G2 or Capterra. K40 user groups consistently recommend it for stock machines.
7. Universal Gcode Sender (UGS)
Universal Gcode Sender is a cross-platform Java sender for GRBL devices. It is widely used in CNC and works fine for laser control with the right settings.
Start free on Windows, macOS, or Linux; connect over serial, load G-code, and use the visualizer to confirm paths. It is stable and device-agnostic, which is helpful across mixed shops. Active development has kept compatibility current with GRBL variants, and for laser use careful S-value and mode settings keep power output consistent during speed changes. Advanced features include macros, probing for CNC, and workspace management — for laser, I like the visualizer and reliable streaming on long raster jobs.
I keep UGS as a backup sender: if a driver update breaks another app, UGS usually still connects and streams cleanly. The community wiki and GitHub issues are active, so answers are easy to find.
How UGS works and key features
UGS presents a jog panel, a G-code console, and a 3D path view. You can jog to frame a job, set origins, and stream G-code with buffer controls that prevent stalls; there are no templates, but you can save macros and workspaces, and advanced users can send custom commands, adjust feed overrides, and handle alarms from the console.
It provides run timers and error logs, and automation lives in macros for homing, air assist, and laser on/off sequences. You will pair it with a design tool for prep, and support is community-driven with detailed docs. Overall, it is a reliable, flexible sender for many controllers.
Who UGS is for
Ideal for mixed CNC/laser shops, Linux users, and anyone wanting a steady, cross-platform sender. It excels at long streaming jobs and device troubleshooting. If you want built-in design or camera features, pick a device suite instead. Beginner-friendly for sending, with some learning for console commands.
UGS pricing
UGS is free and open source, funded by community contributions.
- Free: $0/month, includes cross-platform sender, visualizer, macros, and GRBL console
Compared with paid senders, UGS is a solid value for reliability. If you need design tools, pair it with Inkscape or Kiri:Moto.
UGS pros and cons
- Pros: Cross-platform, reliable streaming, visualizer, free
- Pros: Good for mixed CNC and laser environments
- Cons: No design tools, setup can feel technical
- Cons: Fewer laser-specific presets than device suites
If stability is your priority, UGS delivers. If you want an all-in-one laser editor, look to vendor apps.
UGS reviews
No formal listings on major review platforms. GitHub and maker communities report dependable performance over long jobs.
What is the best laser engraving software right now?
The short version: LaserGRBL for control, Inkscape for design, and Kiri:Moto for browser-based CAM. Together they cover design, CAM prep, and sending without costing a cent.
LaserGRBL is my number one because I use it weekly, and this is not sponsored. I found it through Ortur and Atomstack threads when I kept hitting driver snags with other tools — the first thing that impressed me was how fast it detected my board and how clear the job preview looked, and the clincher was photo dithering that produced crisp coasters without heavy tuning. On value it holds up well: paid senders can run from tens of dollars up, and if you already have Inkscape for vectors, LaserGRBL fills the control gap at zero cost. For a small shop doing batch tags, that savings can buy better blanks or a spare lens.
Inkscape is my close second — the best free vector editor I have used, exporting clean SVGs that every sender likes. If your work is heavy on logos, text, and precise layout, Inkscape is the anchor, and recent polish keeps it feeling modern while extensions give you G-code when you want it. Its unique strength is control: nodes, paths, booleans, and offsetting let me dial kerf and fit parts perfectly, and if I were running a sign-heavy Etsy shop I might make it the daily driver and only open a sender to stream jobs.
Kiri:Moto is my third choice and a great alternative for browser-based CAM — perfect for Chromebooks, classrooms, or any setup where installs are a pain, letting you plan paths, set per-color ops, and export G-code to send with UGS or LaserGRBL. In practice I mix tools by job: Inkscape for layout, Kiri:Moto for a quick CAM sanity check, LaserGRBL to send. Choosing between them is hard because they excel at different steps, but I keep LaserGRBL as my daily control app because it connects fast and handles images well, paired with Inkscape for design — a balance that keeps projects moving without surprises. Stay safe, keep a fire watch, and happy engraving.
Frequently Asked Questions
Q: What free software should I start with as a beginner?
Start with Inkscape for vectors and LaserGRBL for sending if you are on Windows with a GRBL laser. That combo covers design and control without cost.
Q: Can I engrave photos with free tools?
Yes. LaserGRBL includes dithering modes that work well for photos. Device apps like xTool Creative Space and Snapmaker Luban also handle photo engraving with presets.
Q: Will these tools work with my CO2 laser?
If your controller speaks GRBL, LaserGRBL or UGS should work. Stock K40 boards use K40 Whisperer. Branded machines often come with their own free apps.
Q: Do I need a camera for alignment?
No, but it helps with repeatable placement. xTool Creative Space and Luban support cameras on certain models. Without a camera, use framing and jigs for accuracy.