

I fell into photogrammetry the hard way, on a tight deadline for a museum feature that needed a clean 3D scan of a weathered sculpture. I had photos, a stubborn laptop, and no budget for premium software.
I tested every free option I could find. Some crashed, some needed command line patience, and some quietly produced gorgeous meshes once I fed them good images. That week taught me which tools help and which slow you down.
The goal was simple: accurate geometry with sensible texture, without babysitting settings all night. I looked at what top studios do. They standardize capture, keep consistent overlap, then pick a pipeline that fits their hardware and time window.
The tricky part is matching your needs to the right tool. A drone mapper, a heritage archivist, and an indie game dev want different tradeoffs. You do not need the most complex setup to get strong results.
This guide shares what actually worked for me and our team at Techpinions. No hype, no paid placements. Just clear picks, install notes, and honest limits so you can scan with confidence.
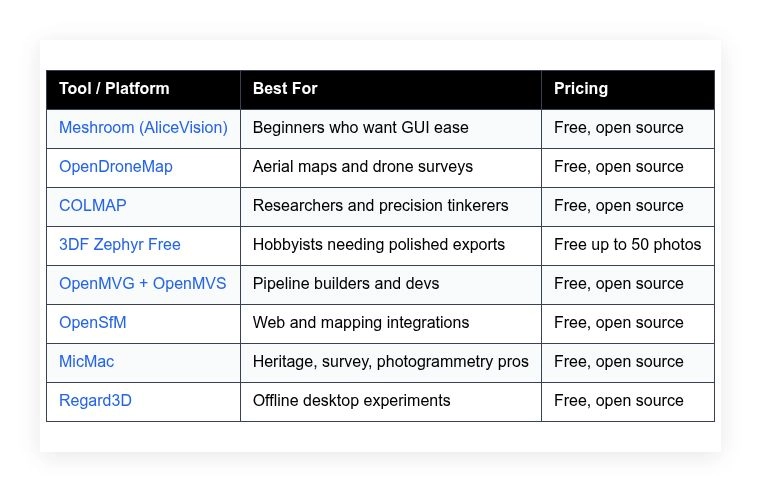
First, here is a quick summary you can skim before diving into the detailed reviews below.
Comparison of 8 best free photogrammetry software in 2026 with pricing and recommended use cases
Scroll down for my detailed take on each option, including where I picked a favorite for daily use and which free choices suit beginners best.
What is a photogrammetry software?
Photogrammetry software is a type of computer application that reconstructs 3D geometry and texture from overlapping photos. Its main purpose is to turn images into measurable, usable models.
In imaging, the saying is garbage in, garbage out. With photogrammetry, good capture gives you scale, accuracy, and ownership of your data. That means control and repeatability without renting access to someone else’s platform.
A solid 3D model from your own photos can rival a mid-tier laser scan for many tasks. I have seen a 200-photo set produce millimeter-level detail, which would cost far more using a service bureau.
At its core, photogrammetry software lets photographers, drone pilots, survey teams, and 3D artists load overlapping images, match features, solve camera poses, and output meshes, point clouds, maps, and textured assets.
People often pair it with capture planning tools, ground control workflows, mesh cleanup in Blender, GIS software for mapping, and 3D viewers for sharing.
Not all tools produce the same quality or speed, so picking the right fit really matters.
How to choose the best photogrammetry software
I know choosing a photogrammetry tool can feel overwhelming. There are a lot of names, lots of settings, and many ways to go wrong on the first try.
I wrote this guide to help you match your project and hardware to software you can trust. My aim is to save you a weekend of trial and error.
Most articles on this topic are posted by vendors or by sites that run sponsored lists. I am not sponsored by any platform on this list. What follows is my straight take based on real projects and repeat tests.
Here are some questions you should ask when looking for a photogrammetry tool:
- How generous is the free tier and what are the limits?
- Can I complete a full end to end run without scripting?
- Will this scale to larger photo sets as I grow?
- How does cost change if I need premium add ons later?
- Does it support my output needs like meshes, orthos, and DEMs?
- What quality metrics or logs help me judge results?
- How hard is it to export and switch tools if needed?
- Is it reliable on my GPU and OS and under load?
- Does it handle masks, control points, GPS tags, and GCPs?
That is a lot to weigh, but my ranked picks below answer these points in plain language.
Okay, enough of me rambling, let us get into the list.
8 best photogrammetry software in 2026
Here are my top picks for the best photogrammetry software:
- Meshroom (AliceVision)
- OpenDroneMap
- COLMAP
- 3DF Zephyr Free
- OpenMVG + OpenMVS
- OpenSfM
- MicMac
- Regard3D
Let us see which one is right for you.
1. Meshroom (AliceVision)
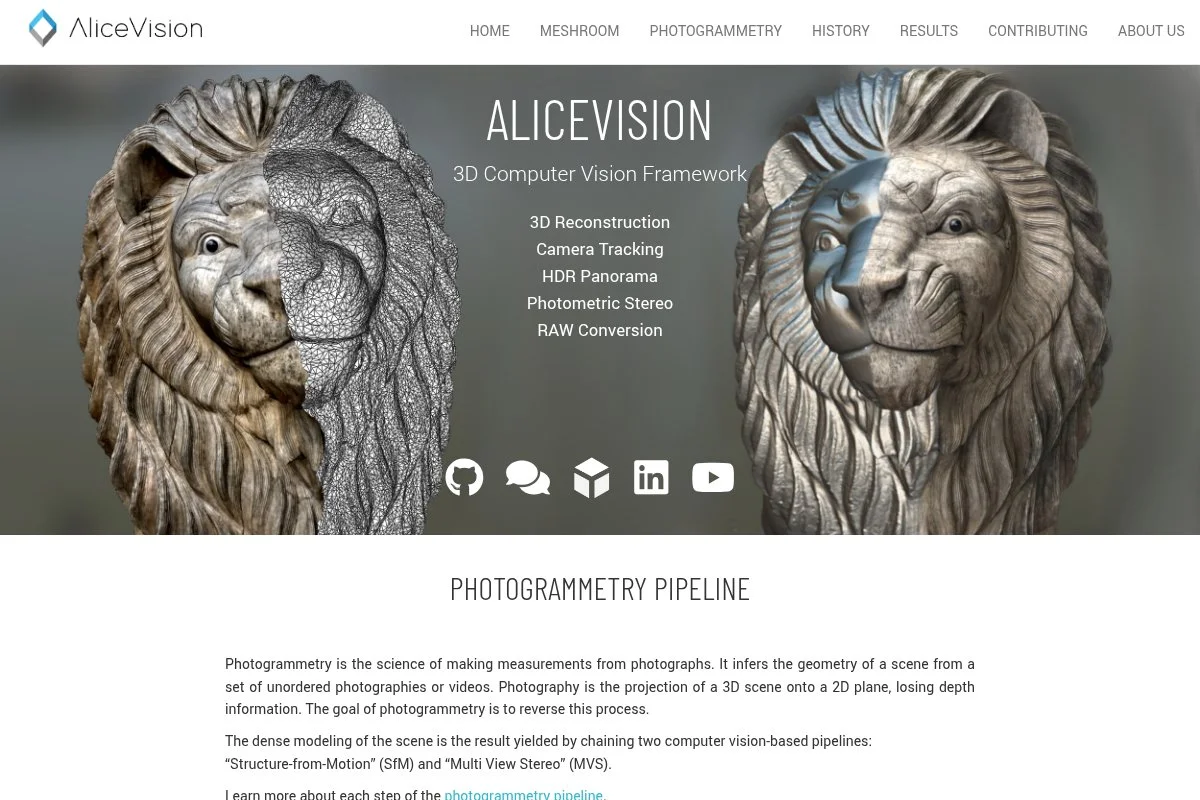
Meshroom is a free, open source photogrammetry app built on the AliceVision framework. It gives you a proper node based pipeline with a friendly desktop GUI. AliceVision has active academic and industry contributors, which gives me confidence in its math and momentum.
You start at zero dollars. Install, drag your photos in, and hit Start. The interface shows a graph of each step, from feature extraction to meshing and texturing. Daily tasks include reordering nodes, tweaking depth maps, and re-running only the stages you changed.
Recent builds improved CUDA support, depth consistency, and camera model handling. The project’s GitHub issues move quickly, so fixes and small upgrades roll in. That means fewer blockers on new GPUs and better results with mixed focal lengths.
If you want advanced control, Meshroom exposes parameters for keypoint density, outlier filtering, and photometric meshing. You can branch the graph to try settings side by side. That level of control feels like pro software without a price tag.
I use Meshroom for object scans and small scenes. It has saved me more than once when a client needed a textured model by morning.
I also like the clear progress logs and intermediate outputs. You can inspect each stage, which helps debug weak photo sets fast.
How Meshroom (AliceVision) works and key features
Meshroom uses a visual, node based interface. You can run the default pipeline or open every step for tuning. Templates cover quick object scans and full scene reconstructions. You can customize anything and save your own graph presets.
Under the hood, it runs the AliceVision engine for feature matching, structure from motion, depth maps, meshing, and texturing. Advanced users can tweak parameters, run on GPU with CUDA, and automate via command line.
Meshroom logs quality metrics like reprojection error. You can view sparse and dense clouds, meshes, and UVs. Automation is simple: kick off a batch via CLI or reuse partial results to save time.
It includes tools for masks, camera intrinsics, and sensor databases. Support comes from active docs, GitHub discussions, and a helpful community.
Overall, the experience hits a sweet spot. It is friendly for newcomers yet deep enough for power users.
Who Meshroom (AliceVision) is for
Best for indie 3D artists, students, YouTube creators, tabletop scanners, and small studios. It shines with object scans, prop capture, and room scale scenes. The node graph helps technical users test settings. If you need survey grade mapping or GCP workflows, OpenDroneMap might fit better. No heavy coding needed for basic use.
Meshroom (AliceVision) pricing
Meshroom is open source with no license fees. You can use it commercially. There is no paid tier. Your only cost is your hardware and time.
- Free: unlimited usage, full pipeline, GPU support where available
Compared to paid apps, the value is obvious. You get a capable GUI and quality output without a subscription. If you like it, contribute code or fund development to support the project.
Meshroom (AliceVision) pros and cons
Pros:
– Free with a clear, visual pipeline
– Strong results on consumer GPUs
– Easy to rerun parts of the pipeline
– Great community and documentation
Cons:
– Windows and Linux focus, no native macOS package
– Can be slow on very large photo sets
– Fewer turnkey survey tools than ODM
Meshroom is a top pick if you want a no cost desktop app that still gives you control and quality.
Meshroom (AliceVision) reviews
No major listings on G2 or Capterra. Community feedback on GitHub and forums is active and positive, with many real project showcases.
2. OpenDroneMap

OpenDroneMap is a free toolkit for processing aerial images into maps, point clouds, and 3D models. It has a strong community and powers many civic and commercial drone projects. I trust it for field work and repeatable mapping.
You can run ODM from the command line or through WebODM, a browser based interface. Setup is straight, and presets help you choose outputs like orthophotos, DSMs, and textured meshes. Day to day, you queue jobs, set ground sampling and texturing, then export to GIS or modeling tools.
Recent updates improved speed on large datasets, multi camera support, and ground control workflows. The ecosystem around WebODM keeps growing with plugins and quality of life features.
Advanced users get GCP management, coordinate systems, and tiled map outputs. You can tune dense point cloud settings, do split merge on huge sets, and script the whole pipeline.
I rely on ODM when accuracy and geospatial outputs matter. It has earned a spot in my kit for site surveys and drone missions.
One more plus: the documentation is practical, with field tested advice on flight planning and ground control.
How OpenDroneMap works and key features
The WebODM interface is minimal and clear. Create a project, upload images, set options, and run. Templates cover mapping, 3D modeling, and plant health indices. You can customize every parameter if needed.
ODM supports GPS tags, GCPs, EPSG codes, and common export formats. It generates orthophotos, DSM/DTM, point clouds, textured models, and tiles. Automation is simple using the CLI or the WebODM API.
There are tools for forms, ground control import, and task splitting. Reporting includes processing logs and quality notes that help you judge alignment. Community help is strong across GitHub and forums.
The experience favors power and repeatability. It is beginner friendly with WebODM, yet deep enough for survey teams.
Who OpenDroneMap is for
Great for drone pilots, surveyors, GIS teams, agriculture, and construction monitoring. It excels at orthomosaics, elevation models, and large site meshes. GCP and CRS support suits geospatial work. If you only scan small tabletop objects, Meshroom is easier. Some command line comfort helps at scale.
OpenDroneMap pricing
OpenDroneMap is open source and free to use. WebODM has a free community edition. Prebuilt installers and cloud hosting are offered by third parties for a fee, but the core is free.
- Free: full processing pipeline, WebODM community edition
Against commercial mappers, ODM saves serious money, especially on big jobs. If you want a paid, supported installer, check the project links, but you can run it yourself at no cost.
OpenDroneMap pros and cons
Pros:
– Free and suited for drone mapping
– Strong GCP, CRS, and GIS exports
– Scales to large surveys
– Active community and plugins
Cons:
– Heavier learning curve than simple GUIs
– Hardware hungry on huge datasets
– Best features shine with WebODM setup
ODM is my choice for aerial mapping and any project where geospatial accuracy matters.
OpenDroneMap reviews
No major entries on G2 or Capterra. It has wide community adoption and many published case studies in civic tech and GIS blogs.
3. COLMAP
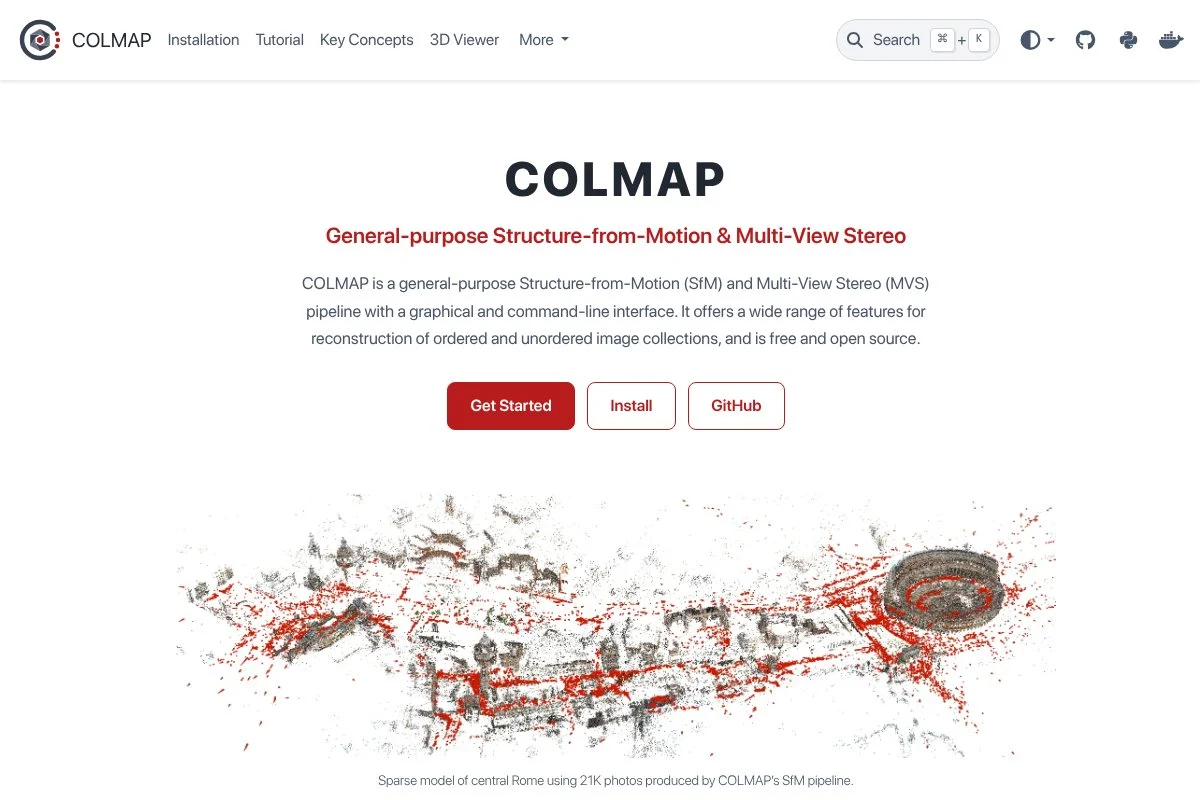
COLMAP is a free structure from motion and multi view stereo pipeline developed in academia. It is a standard reference in papers and benchmarks. That pedigree makes it a go to for precision and for understanding the process end to end.
You can use COLMAP through a simple GUI or via command line. Getting started is quick once you grasp the workflow. You reconstruct sparse points, estimate poses, run dense matching, then export to a mesher of your choice.
Its development has tracked modern features like improved feature extraction and faster matching on GPUs. Integration with downstream meshers keeps it relevant for custom pipelines.
Higher level features include image undistortion, various camera models, and detailed stats on errors and matches. These let you diagnose weak coverage and fix capture habits.
I use COLMAP when I need tight control of the early stages. It is also handy for building educational demos on SfM.
The documentation is clear enough for patient beginners and excellent for technical users who want to know exactly what is happening.
How COLMAP works and key features
The GUI is minimal. Import images, run feature extraction and matching, then reconstruct sparse points. After bundle adjustment, you create a dense model and export. Templates are light, but defaults work well.
COLMAP supports camera intrinsics, various matchers, and GPU acceleration. Outputs include sparse and dense point clouds, depth maps, and camera poses. You can feed those to meshers like OpenMVS.
Analytics cover reprojection error, registered images, and match counts. Automation is mature using CLI scripts for batch runs. Support is community based via GitHub issues and academic forums.
In short, it is powerful and transparent. Not the flashiest interface, but it gets the job done at a high level.
Who COLMAP is for
Ideal for researchers, technical artists, and anyone building custom pipelines. It excels when you want control of SfM and MVS stages. If you need an all in one GUI with meshing and texturing included, Meshroom is easier. Some technical patience helps.
COLMAP pricing
COLMAP is free and open source. There are no paid tiers. You can use it for commercial projects under its license.
- Free: full SfM and MVS pipeline with GPU support
As a zero cost tool with research grade features, the value is high. You may add a separate mesher for final assets, still at no cost with open source options.
COLMAP pros and cons
Pros:
– Research grade accuracy and control
– GUI plus full CLI automation
– Great diagnostics for pose and error checks
Cons:
– No built in textured mesh export
– Sparse templates and steeper learning curve
– UI feels technical for newcomers
COLMAP is my choice for precise reconstructions and teaching the core ideas behind photogrammetry.
COLMAP reviews
No formal listings on G2 or Capterra. It is widely cited in academic work and used in many open pipelines.
4. 3DF Zephyr Free
3DF Zephyr Free is the no cost edition of 3Dflow’s commercial suite. The company has a long track record in photogrammetry for industry and education. The free edition brings a polished GUI and good out of the box results for small projects.
Setup is quick, with a guided wizard that walks you through alignment, dense cloud, mesh, and texture. Day to day, I appreciate the straightforward presets and the clean viewport. It feels like professional software because it is.
Recent versions have improved performance and added format support. The paid tiers keep expanding with survey features, but the free tier remains a solid entry point for props and small scenes.
Premium features in the paid tiers include advanced control points, orthophoto tools, and batch processing. Those are not in the free edition, which is fair for a starter license.
I recommend Zephyr Free to friends who want fast wins without learning a node graph. It is friendly and gets you to a clean textured mesh fast.
Support materials are strong. Tutorials and templates help you avoid common capture mistakes.
How 3DF Zephyr Free works and key features
Zephyr’s interface is classic desktop. Import photos, pick a preset, and run. You can inspect each stage and adjust quality sliders. Templates for different scene types speed up setup.
You get alignment, dense cloud, meshing, and texturing in one place. Exports cover common formats for DCC tools and game engines. Advanced users can tweak parameters, but the defaults are good.
Reporting includes logs and simple quality cues. Automation is limited in the free edition. Support is through docs, videos, and an active forum.
Overall, it is a polished, beginner friendly experience that still lets you grow.
Who 3DF Zephyr Free is for
Great for hobbyists, students, indie devs, product scanners, and content creators. It excels at small object scans and quick textured models. The free edition caps image counts, so survey teams and drone mappers should look at ODM. No special technical skill required.
3DF Zephyr Free pricing
The Free edition costs nothing for personal and learning use. It limits the number of input photos and trims advanced features. Paid tiers unlock higher limits and pro tools.
- Free: up to a limited number of photos, full GUI, basic exports
- Lite: higher image limits, more exports, added tools
- Pro/Aerial: professional features including control points and survey workflows
Value wise, the Free edition is a great on ramp. Check 3Dflow’s site for current licensing terms and any image limit details for your needs.
3DF Zephyr Free pros and cons
Pros:
– Polished interface with fast setup
– Good default presets and exports
– Smooth learning curve for first timers
Cons:
– Photo count limits in the free tier
– Fewer pro features unless you upgrade
– Windows focus for best performance
Zephyr Free is a smart pick if you want a guided path to results and your projects are small.
3DF Zephyr Free reviews
There are listings on software review sites, with generally positive feedback about ease of use. Exact ratings vary, and review counts are modest.
5. OpenMVG + OpenMVS
OpenMVG and OpenMVS are free, open source libraries that pair nicely: OpenMVG handles structure from motion, OpenMVS handles dense reconstruction and meshing. Together, they form a flexible pipeline for developers and technical users.
Getting started means building from source or using community builds, then running a sequence of CLI tools. You control each step and can stop, inspect, and resume. Daily use is scripting runs and adjusting parameters for your scene.
Both projects stay active with algorithm updates and fixes. The duo remains a favorite for custom workflows and for research labs that need full transparency.
Advanced features include support for various camera models, masks, and dense options for speed and quality. You can plug in different matchers or experiment with settings at each stage.
I like this combo for teaching and for building repeatable pipelines that I can version and deploy. It is not the easiest, but it is powerful.
The documentation has improved over the years, and example scripts help you avoid common gotchas.
How OpenMVG + OpenMVS work and key features
You run a chain of commands for feature extraction, matching, pose estimation, dense reconstruction, meshing, and texturing. There is no big GUI, which keeps things lean and very configurable.
Templates are replaced by scripts you write and reuse. Technical users can compile with GPU support where available, integrate custom code, and add their own steps around the pipeline.
Reporting comes from logs and simple stats. Automation is first class because everything is CLI driven. Support is community based, with active GitHub repos and issues.
Overall, this is a builder’s toolkit, excellent for those who want full control and repeatable runs.
Who OpenMVG + OpenMVS are for
Best for developers, technical directors, research teams, and pipeline engineers. It excels at batch processing and custom workflows. If you need a friendly GUI and quick presets, Meshroom or Zephyr Free are better. Command line comfort is required.
OpenMVG + OpenMVS pricing
Both projects are open source and free for commercial use under permissive licenses. There are no paid editions.
- Free: full pipeline via CLI, customizable and scriptable
Compared to paid suites, the value is high if you have technical skills. You trade convenience for control and repeatability.
OpenMVG + OpenMVS pros and cons
Pros:
– Full control and scriptable pipeline
– Free and suitable for commercial use
– Great for large batch runs
Cons:
– No unified GUI
– Setup and builds can be tricky
– Steeper learning curve
This pairing is ideal if you want to own your process and scale through automation.
OpenMVG + OpenMVS reviews
No formal review listings. Adoption is strong among developers and in open source examples.
6. OpenSfM
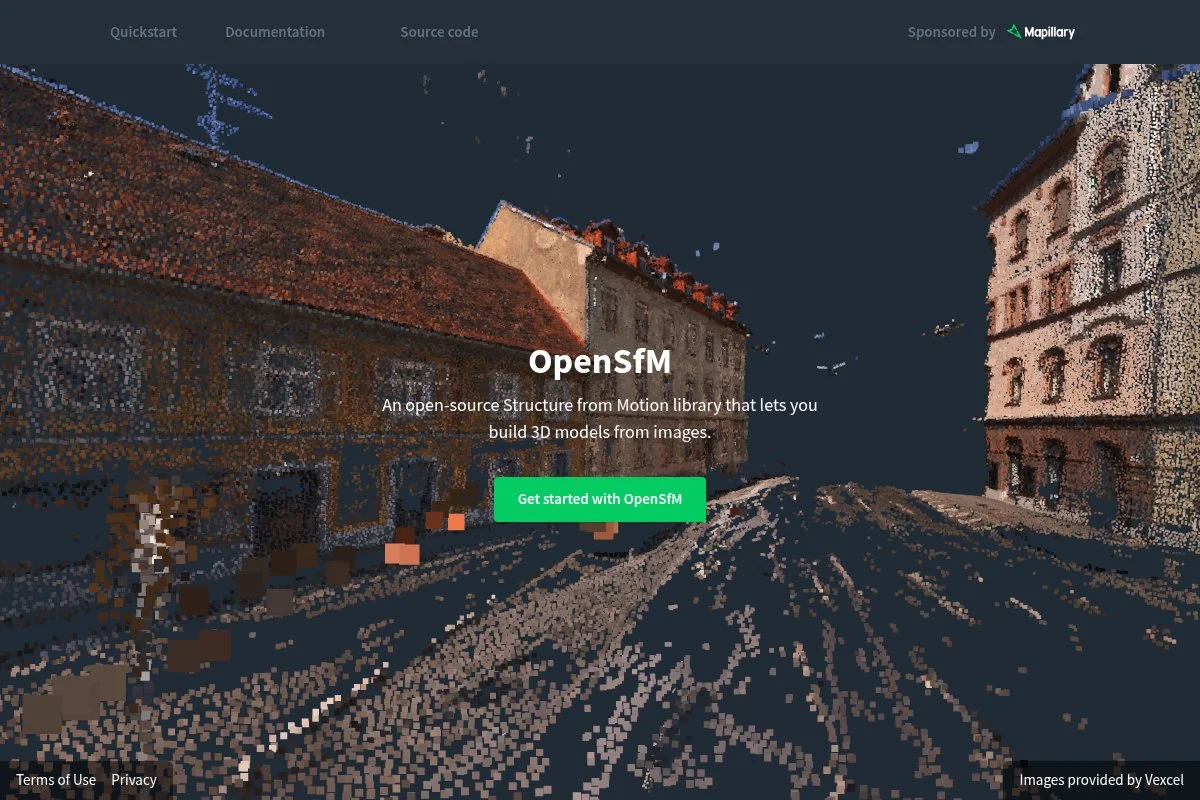
OpenSfM is a free library from the Mapillary community for structure from motion and reconstruction. It is used in mapping workflows and web integrations. If you want to tie photogrammetry to online viewers or custom services, it is a good fit.
Setup involves Python and running command line tools. The default pipeline handles feature detection, matching, pose estimation, and reconstruction. You can feed results to downstream meshers or viewers.
Recent work has focused on performance, GPS priors, and handling street level imagery. That keeps it relevant for mapping and navigation use cases.
Advanced users get hooks for custom feature extraction, priors, and integrations. You can process large crowdsourced sets if your hardware can handle it.
I reach for OpenSfM when building web centric pipelines. It plays nicely with APIs and modern data stores.
The docs are straight and the codebase is approachable if you are comfortable with Python.
How OpenSfM works and key features
OpenSfM runs from the command line with a config file that controls the pipeline. You can set camera parameters, priors, and matching strategies. There is no GUI, which suits server side processing.
Outputs include camera poses, sparse and dense reconstructions, and quality metrics. You can automate the entire flow and plug it into web backends and queues.
Templates are minimal, but example configs help. Support comes from documentation and GitHub discussions. It is geared toward developers and integrators.
The experience is developer friendly and scalable for web and mapping tasks.
Who OpenSfM is for
Best for mapping teams, web developers, and mobility projects. It excels with street level photos, GPS priors, and server side processing. If you want a desktop GUI, pick Meshroom or Zephyr Free. Technical skill is required.
OpenSfM pricing
OpenSfM is free and open source under a permissive license. There are no paid tiers, and you can use it commercially.
- Free: full pipeline, developer focused, Python based
It offers strong value if you plan to integrate photogrammetry into web services and mapping pipelines.
OpenSfM pros and cons
Pros:
– Free and flexible for web pipelines
– GPS priors and street level focus
– Works well in server environments
Cons:
– No desktop GUI
– Setup and configs take time
– Best for developers, not casual users
OpenSfM is a solid building block for mapping heavy applications and services.
OpenSfM reviews
No major review platform listings. It is widely referenced in open mapping communities and developer forums.
7. MicMac
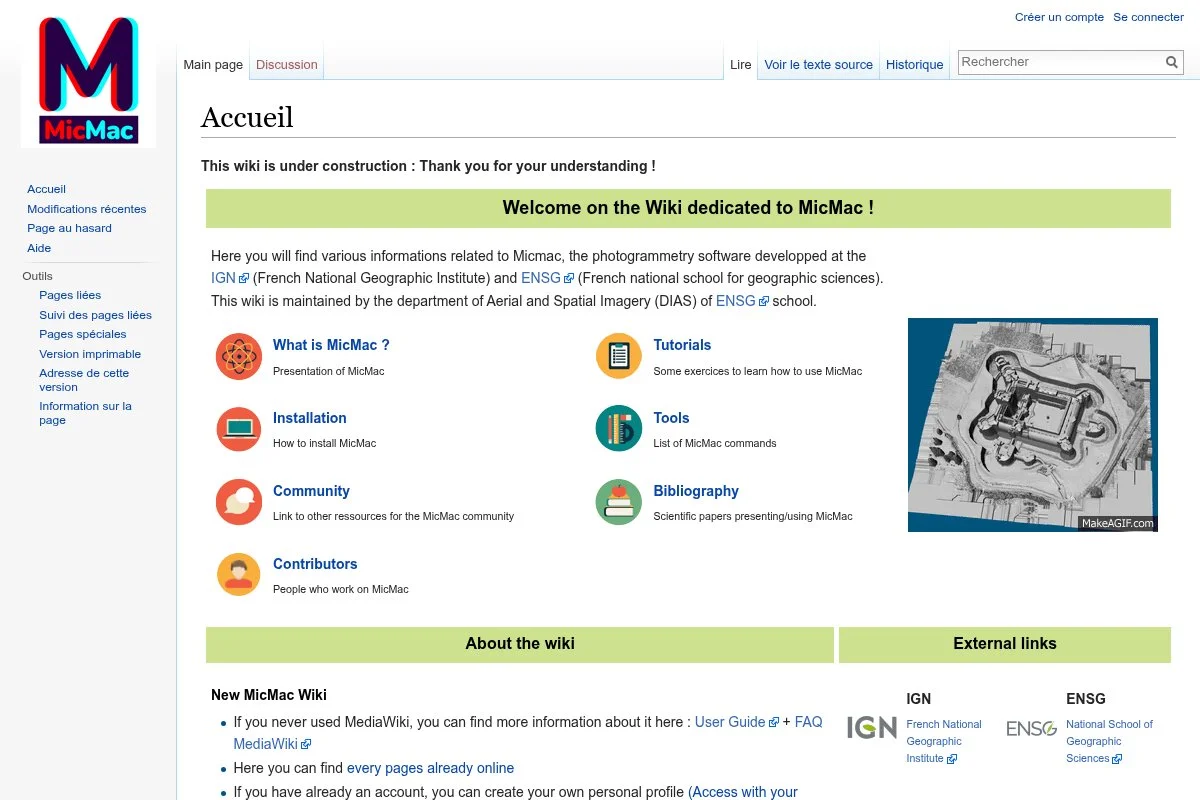
MicMac is a free photogrammetry suite born in the French national mapping and survey community. It targets professional survey and heritage needs. The feature set is deep and proven on complex projects.
Getting started takes patience. You will use command line tools and scripts. Once set, it can deliver highly accurate orthos, DEMs, and textured models with excellent control.
The project continues to evolve, with steady fixes and updated docs. Heritage and academic teams rely on it for demanding capture sets.
Advanced features include fine control of camera models, GCP handling, and strong mapping outputs. It supports masks and complex calibration tasks.
I use MicMac when I want survey grade tools and can invest the time. It rewards careful setup with precise results.
The community shares useful recipes and scripts for repeat jobs.
How MicMac works and key features
MicMac is command line driven with utilities covering the full chain. You configure camera models, run tie point extraction, solve poses, and produce dense outputs and maps. There is no modern GUI, but workflows are well documented.
It handles GCPs, coordinate systems, and precise geodesy tasks. Exports suit GIS and 3D tools. Automation is straightforward through scripts, which is perfect for repeat surveys.
Support comes from docs, mailing lists, and community guides. Expect a learning curve, with high payoff once you master it.
Overall, MicMac is powerful for survey and heritage work where accuracy is key.
Who MicMac is for
Best for surveyors, archaeologists, heritage teams, and GIS labs. It shines for orthomosaics, elevation models, and controlled capture. If you want quick wins with a GUI, choose Meshroom. Technical skill is required.
MicMac pricing
MicMac is free and open source. There are no paid versions or usage fees.
- Free: full suite for survey grade outputs
Compared to commercial survey tools, MicMac saves serious budget if you can handle the setup and workflow.
MicMac pros and cons
Pros:
– Survey grade outputs with GCP workflows
– Free and proven on complex projects
– Scriptable for repeat jobs
Cons:
– Steep learning curve and CLI focus
– Documentation can feel dense at first
– Fewer creature comforts than GUI apps
MicMac is excellent if accuracy and mapping features matter more than ease of use.
MicMac reviews
No major third party review pages. It is well regarded in survey and heritage circles with many academic references.
8. Regard3D
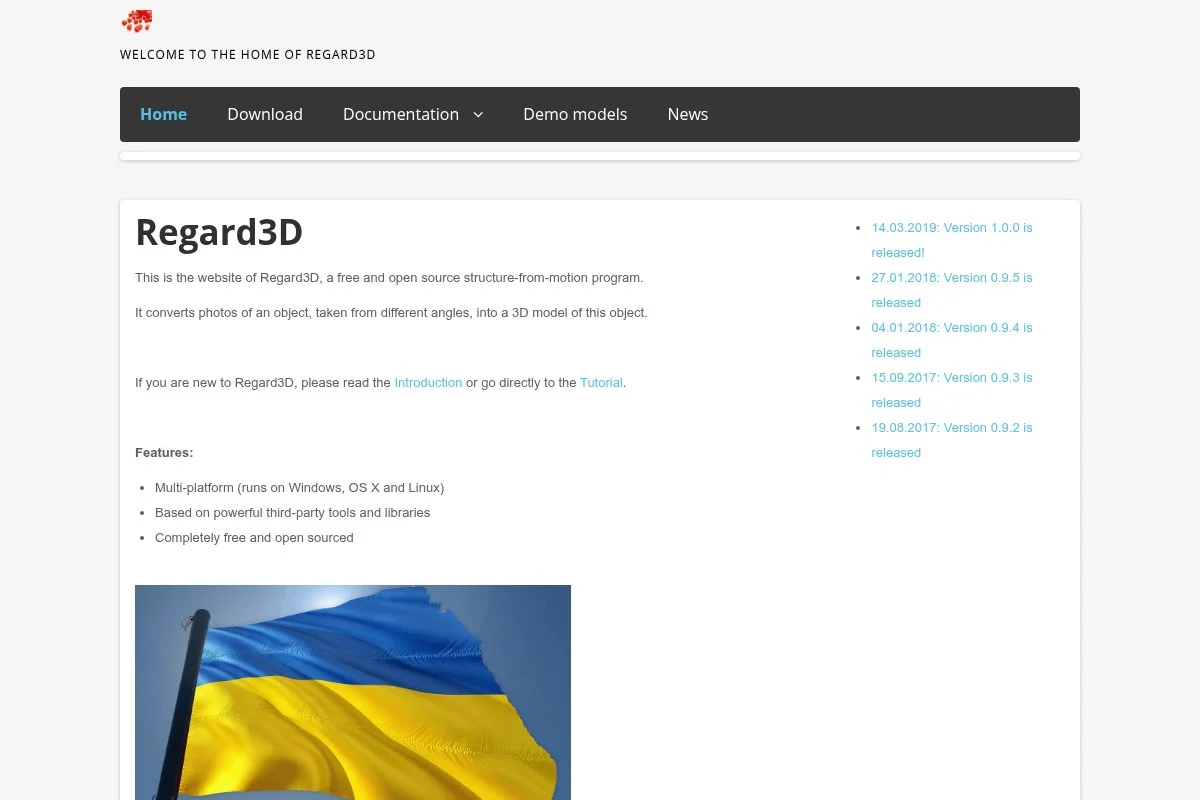
Regard3D is a free, cross platform desktop app for 3D reconstruction. It wraps proven algorithms in a simple GUI. I see it as a handy lab bench for small experiments and teaching.
You import photos, run feature detection, align, densify, and export to mesh. The interface is straightforward, with helpful progress windows. It is easy to try different settings on the same dataset.
Development moves at a modest pace but the tool remains useful for quick tests. It is not trying to be an enterprise mapper, and that is fine.
Advanced users can adjust detectors, matchers, and reconstruction settings. You can export to common formats for Blender or your game engine.
I reach for Regard3D when I want a lightweight desktop run without installing a bigger stack.
The documentation and examples are clear enough for a weekend project or classroom demo.
How Regard3D works and key features
Regard3D offers a clean, menu driven desktop experience. Create a project, add photos, choose detectors, and go. You can run multiple reconstructions and compare outputs.
Templates are simple presets. You can tweak parameters for quality and speed. It exports point clouds and meshes, with texture options depending on your pipeline.
Analytics are basic, with logs and preview windows. Automation is limited to running batches inside the app. Support comes from the website and user forum.
Overall, it is a friendly tool for small projects and learning the basics.
Who Regard3D is for
Best for students, makers, hobbyists, and teachers. It is great for desk scale scans and quick trials. If you need pro mapping, pick ODM. If you want deep tuning, pick COLMAP or Meshroom. Beginner friendly and low stress.
Regard3D pricing
Regard3D is free and open source. There are no paid versions. You can use it freely for personal or commercial projects.
- Free: full desktop app with GUI based pipeline
It is great value as a learning tool or for lightweight needs. If you outgrow it, moving to Meshroom or COLMAP is easy.
Regard3D pros and cons
Pros:
– Free and cross platform
– Simple GUI with clear steps
– Good for classroom and quick tests
Cons:
– Slower and less flexible on large sets
– Fewer advanced features
– Limited automation
Regard3D is a friendly entry point, best for small jobs and learning.
Regard3D reviews
No major review site listings. Community feedback highlights ease of use and classroom value.
What is the best photogrammetry software right now?
My top picks today are Meshroom, OpenDroneMap, and COLMAP. Meshroom is the best all around free desktop choice for most people. OpenDroneMap is my go to for aerial mapping and geospatial outputs. COLMAP is my precision tool for controlled pipelines.
I use Meshroom the most. This is not sponsored. I found it while rebuilding a scan at 2 a.m. after a crash in another app. Meshroom’s node graph let me rerun only the dense step, which saved hours. The main selling point for me is the balance of ease and control. I can start simple, then tune only what I need.
On value, Meshroom is hard to beat. Paid options can run into three or four figures a year for similar quality on small to midsize sets. With Meshroom, my cost is hardware. If I need survey features, I pair it with other free tools and still avoid subscriptions.
OpenDroneMap is a close second. If your focus is orthophotos, DSMs, and site meshes with GCPs, ODM wins. It handles coordinate systems, tiling, and huge projects better than most GUI first tools. The WebODM ecosystem keeps adding helpful touches.
What I love about ODM is how it folds into a repeatable field workflow. Plan the flight, collect GCPs, process, then deliver GIS ready outputs. If I did mostly survey work, I might pick ODM as my daily driver.
COLMAP is my third choice. It is for times when I want to control SfM and MVS precisely, teach the concepts, or test a dataset’s limits. It pairs well with OpenMVS for meshes and gives me clear diagnostics at every step. It is free, accurate, and predictable if you take your time.
I often mix tools. For example, I align with COLMAP, mesh with OpenMVS, and texture in Meshroom. Or I map with ODM, then clean meshes in Blender. That flexibility is the hidden perk of free tools.
Picking between these is not easy. I stuck with Meshroom for daily use because it gets me from folder of photos to a clean textured model with minimal fuss. When mapping calls, I swap to ODM without thinking.
I hope this helped you choose a starting point. If you try one today, shoot a small object with strong overlap, feed it in, and see what you get. Happy scanning.
Frequently Asked Questions
Q: What hardware do I need for free photogrammetry software?
I recommend a modern multi core CPU, 16 to 32 GB of RAM, and an NVIDIA GPU if you want faster runs. A fast SSD also helps a lot. Bigger datasets will want more RAM.
Q: How many photos should I take for a good 3D model?
For small objects, I aim for 80 percent overlap and at least two full orbits. That is often 80 to 150 photos. For rooms or facades, plan more coverage and watch your angles.
Q: Can I use these free tools for commercial work?
Yes, most open source tools here allow commercial use. Always check each project’s license. For 3DF Zephyr Free, review its free edition terms and limits before client work.
Q: What is the fastest way to improve my results?
Improve your photos first. Use steady exposure, sharp focus, even lighting, and high overlap. Add a few marker features for textureless surfaces, then rerun only the dense or meshing step to save time.